Counter
The FlowMattic Counter is a versatile feature designed to track and manage numerical values in workflows dynamically. Whether you need to generate sequential numbers, assign unique IDs, or keep a count of specific events, the Counter simplifies these tasks through automation. It is ideal for use cases like tracking orders, monitoring event participation, or managing ticket numbers.
This tool allows you to configure starting values, increment or decrement numbers automatically, and format the output with prefixes, suffixes, or padded digits. With its user-friendly interface, you can set up counters with ease while enjoying the flexibility to apply advanced customization for specific workflow requirements.
Setting Up a Counter in FlowMattic
1. Create a New Workflow
Go to the FlowMattic Dashboard, where you can manage and create workflows. To start a new workflow, click the “New Workflow” button located in the top-right corner of the Dashboard. This will begin the process of creating your new workflow.
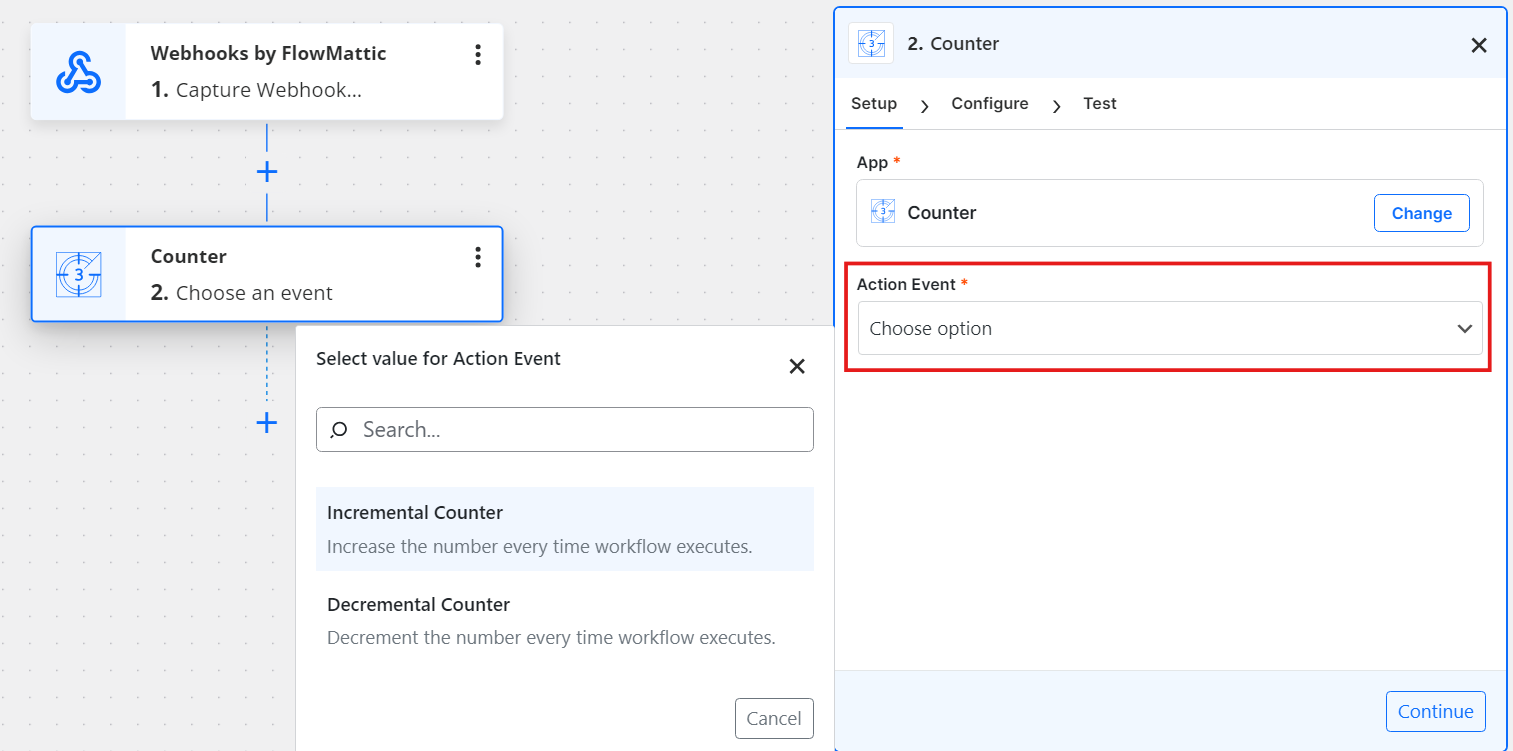
2. Add a Counter Action
-
In the workflow editor, click the + icon to add a new step. From the list of available tools, select Counter under the FlowMattic built-in tools section. This tool is essential for automating the tracking of numbers, whether for incrementing or decrementing purposes.
-
Once selected, choose an appropriate Action Event for the counter. Select Incremental Counter to increase the number or Decremental Counter to reduce it. This depends on whether you want to count up (e.g., for order numbers) or count down (e.g., for ticket availability).
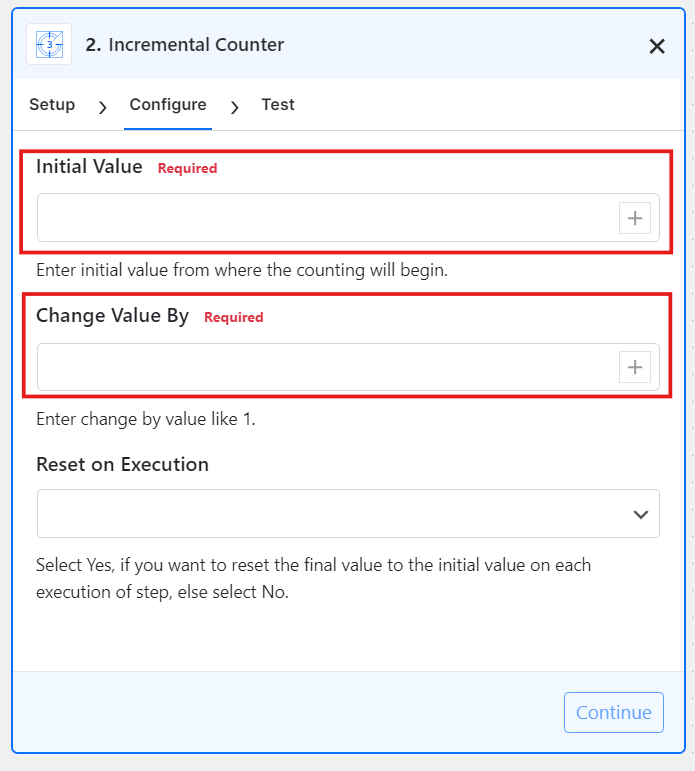
3. Configuring the Counter Settings
-
Initial Value: This is the starting point for your counter, where the counting will begin. You can set it to any integer depending on your needs (e.g.,
0,1, or5). This ensures the counter starts from a defined number before any counting takes place. -
Increment/Decrement Value: This defines the amount by which the counter should change after each execution. If you want the counter to increase, set a positive value (e.g.,
1). For decreasing, set a negative value (e.g.,-1). This controls how quickly or slowly the counter progresses. -
Reset on Execution: Select “Yes” if you want the counter to reset to the initial value after each execution. This ensures the counter starts fresh each time the step is executed. If you select “No,” the counter will continue from its current value, without resetting.
4. Save and Test the Counter
-
Once the configuration is complete, use the Test Action feature to verify the counter’s behavior. This allows you to check whether the counter increments or decrements as intended and ensures that the output formatting meets your expectations.
-
After testing, click Save & Close. This will finalize the counter setup, making it ready for use in your workflow. You can now reference the counter’s output in subsequent actions or integrate it into other applications seamlessly.
